Happy Leo season, readers! (You’re all getting your Chani Nicholas horoscopes, right?). The weather is good. The planets are aligned in your favor. In the northern hemisphere, the days are long. What a perfect time of year.
I find that my yoga practice changes quite a bit with the seasons, and that during these warm summer days, I have a lot of energy and increased flexibility. I wake up earlier. I feel a little braver. I want to play with flying and heart-opening and arm balancing and inverting. I’m also walking a lot and craving a practice that targets all of the muscles that get a little tighter when I’m using them to cruise around à pied. Which makes this a great time to work on the splits.
So I’m going apolitical with the newsletter today and instead offering a simple sequence to work on Hanumanasana, “monkey pose.” Hanuman was known for his great leaps, so as you’re practicing your splits, know that it’s as much about strength as it is about flexibility, and finding that sweet spot between effort and ease.
It’s also about figuring out where you feel sticky. The splits require hamstring flexibility, but they also ask a lot of the hip flexors. As you work through this sequence, and in your practice generally, bring some (non-judgmental) attention to what feels like it’s tight or could use a little extra work / love. If forward folds feel challenging, your hamstrings and lower back may be tight. If it’s hard to get your hips up in backbends or your back foot feels miles away when you try to take hold of it in a lunge, your hip flexors may be the sticking point. Notice it, thank your body for every incredible thing it does, and consider where you might want to hold poses a little longer to let those tight spots warm their way open.
I like to work on splits by warming up with a modified version of the Dharma sun salutation, which is quite fluid, and does a great job of easing open the hamstrings, hip flexors, and heart. Below, I’ll walk you through the steps. I would recommend going through this series three times before going to your deepest point in a full split (for the sake of space / time, only one round is detailed here).
I’ve also posted a video of the (slightly modified) version of this series below. There’s no sound — next time I’ll talk through it — but it’s nice to see how these movements all connect.
Even if you have no ambitions to do the splits, this is a great way to stretch out the lower body. If you’re incorporating this into a longer practice, I would suggest maintaining a focus on front-facing poses as you prep for splits (Warrior I, standing split, Warrior III, rather than poses like Warrior II and half-moon) to keep the hips in line.
One thing about the splits: The hamstrings are really receptive muscles, so you can see a lot of increased flexibility in a fairly short period of time if you’re consistent with them. But it’s also really, really easy to strain or even tear the connective tissue between the hamstring and the butt. So when you’re stretching, make sure the stretch is in the meaty part of your hamstring — and that you’re not feeling a pull in the tissue that sits just below the bottom crease of your buttcheek, where the hamstring meats the glute. If you feel it in that space, ease off a bit.
Enjoy!
***
Start standing at the top of your mat. Take a few deep inhales and exhales. If you work with ujjayi breath, begin to incorporate that.

Inhale the hands above your head; see your thumbs; gently backbend if that feels good.

Exhale to fold over the legs, collarbones broad, spine long.

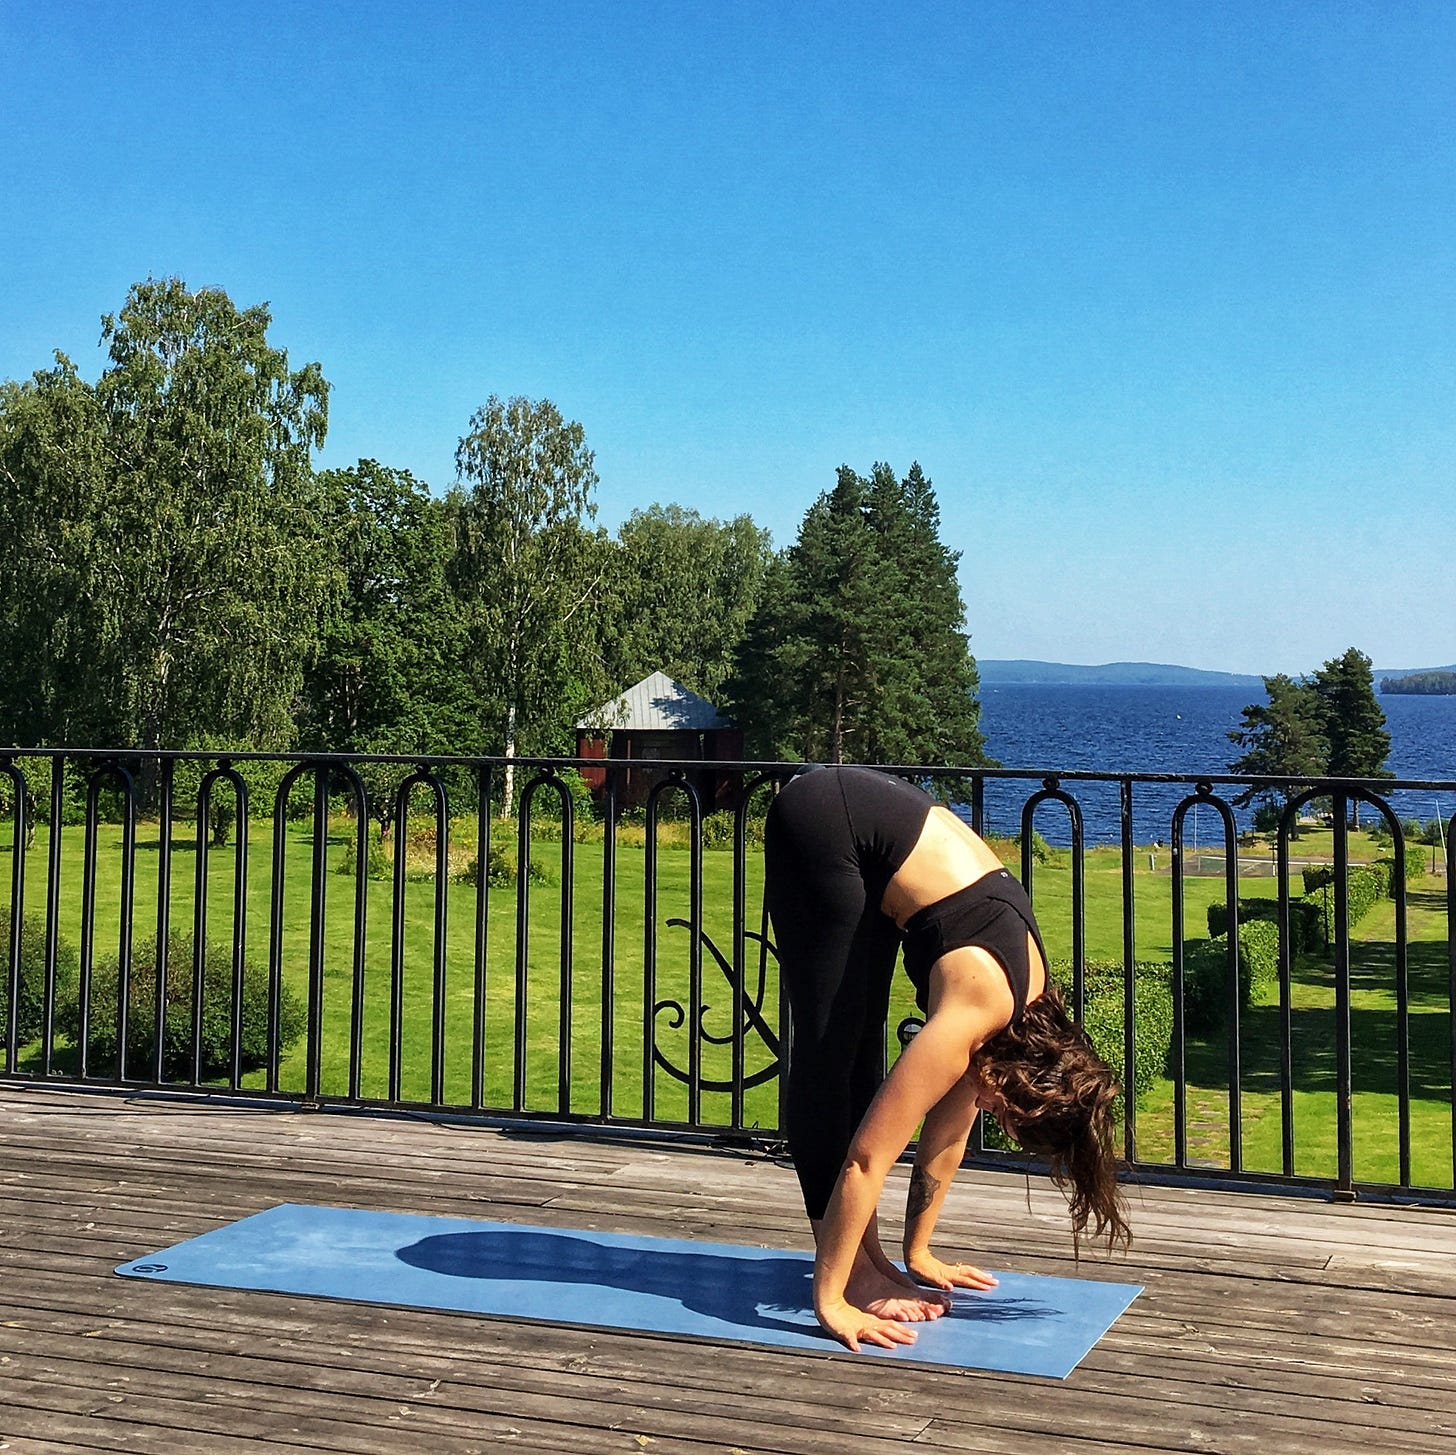
Inhale and step the right foot back, right knee on the floor, hands up for anjaneyasana. Stay for a few breaths.

I like to bend at the elbows with my hands in prayer behind my head, or interlace my fingers behind my head and draw the elbows wide to open the chest.


You can also cactus the arms, and bring the fingers down next to the hips, seeing if you can touch the mat. Wherever you are in this anjaneyasana, consider what your body wants: A fast-moving dynamic practice? Or will it benefit you to stay here, maybe even for a full two or three minutes, to let your hip flexors ease their way open?


For a deeper quad and hip flexor stretch, bend the right knee and take the right foot in the right hand. Keep the hips moving forward and draw the foot close to the bum.

Maybe you bring the foot into the crook of the right elbow. Maybe you clasp your hands and circle the left elbow up and around the head.

Bring both hands around to the mat, and straighten the front leg. You might have to scoot your heel a little bit forward to have your left hip directly above your left knee.

Inhale to lengthen the spine forward, thinking more about the length of the upper body than how close your forehead gets to your knee or shin. You can walk your fingers way forward for length (I love this) or play with walking them back.


Re-bend the front knee and bring both hands inside of the front foot for lizard pose (you can walk the front foot out a little bit toward the edge of the mat if you have tight hips like me).

I like to come up on the back toes and bounce up and down, and move forward and backward, a little bit into that hip before settling in.
Bring the back knee to the floor. If it’s accessible, you can come down to the forearms. If you want a little more, you can bring the left hand over the top of the left foot, and work to have your armpit around your ankle. Maybe your forehead comes to the ground. Maybe, eventually, your chest comes to the ground (mine does not).
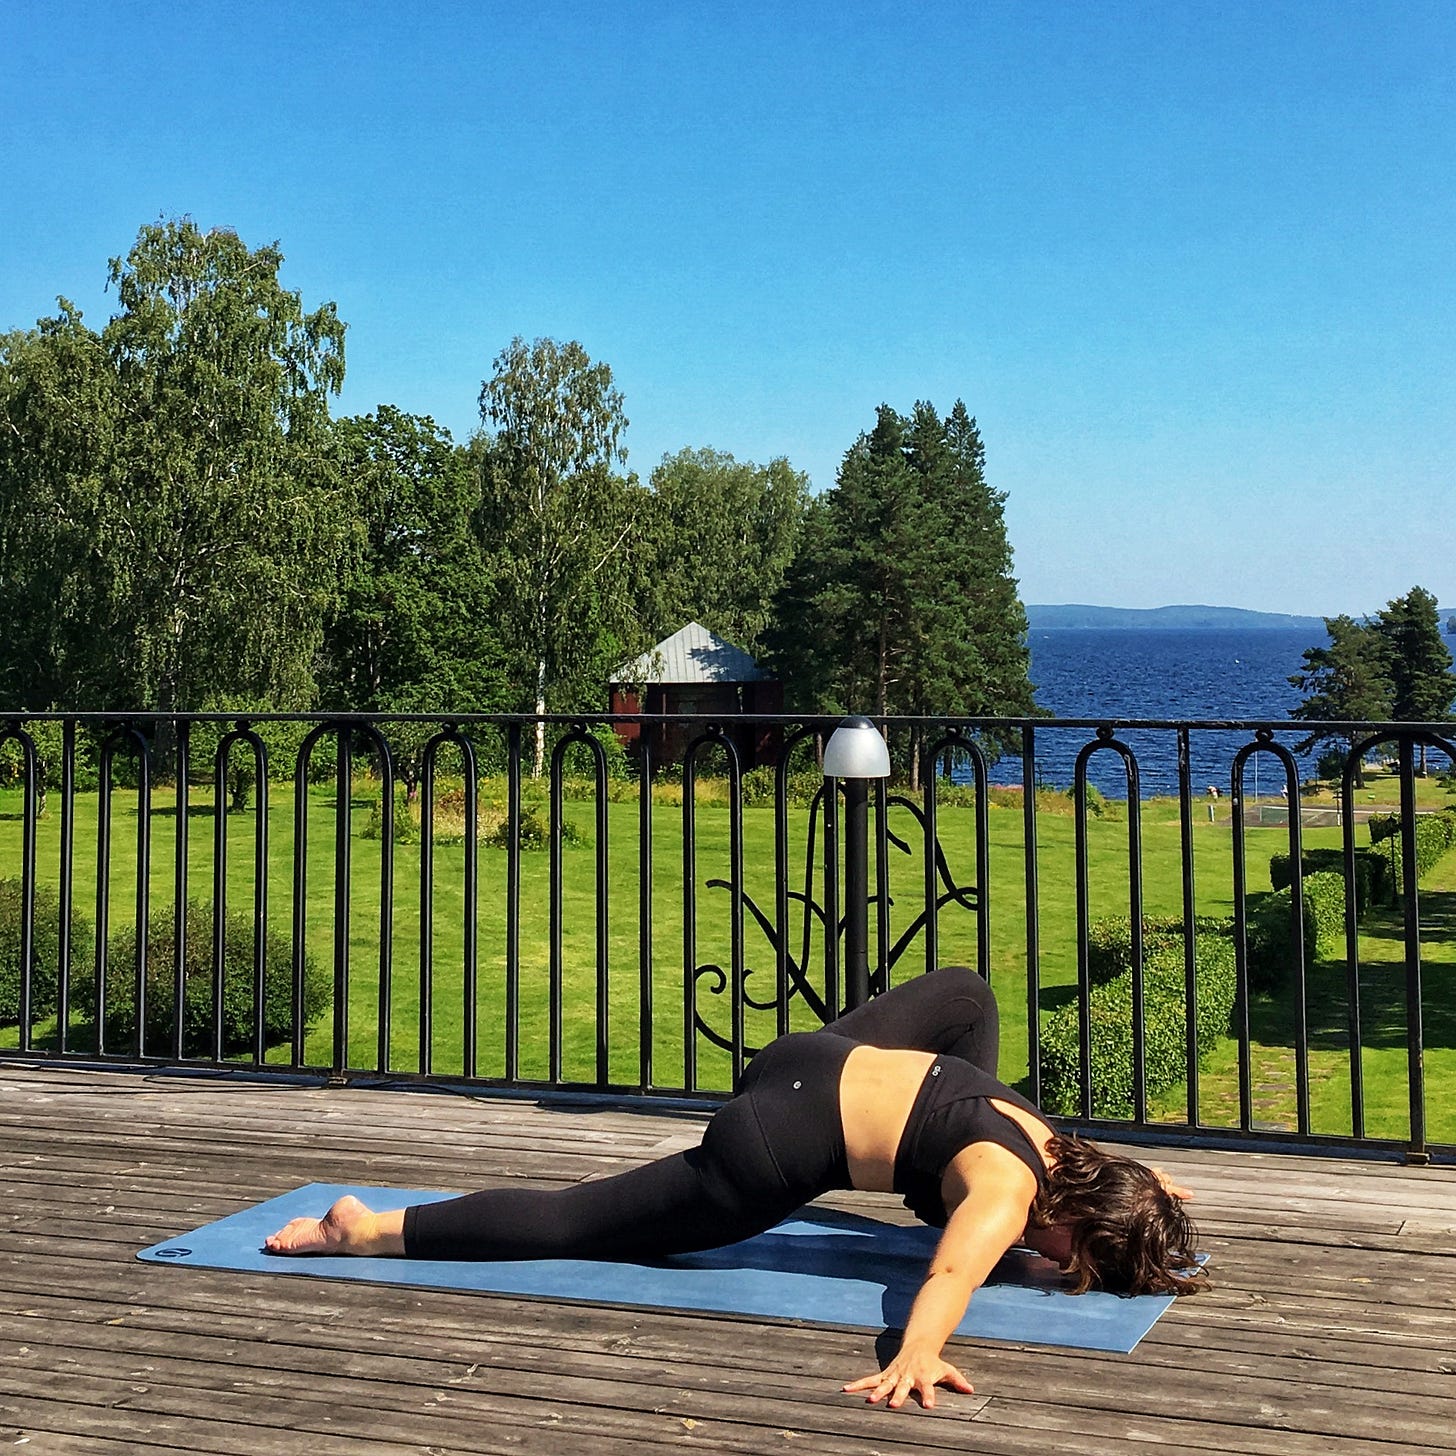
Maybe you come up to your hands, bend the back (right) knee, and take hold of it with your opposite (left) hand. I like to stretch here by first kicking the foot into the hand to open the chest and coming into a small backbend, then shifting to a quad stretch: closing off the hips by drawing them both forward and down, and using the strength of the arm to draw the foot in toward the bum.


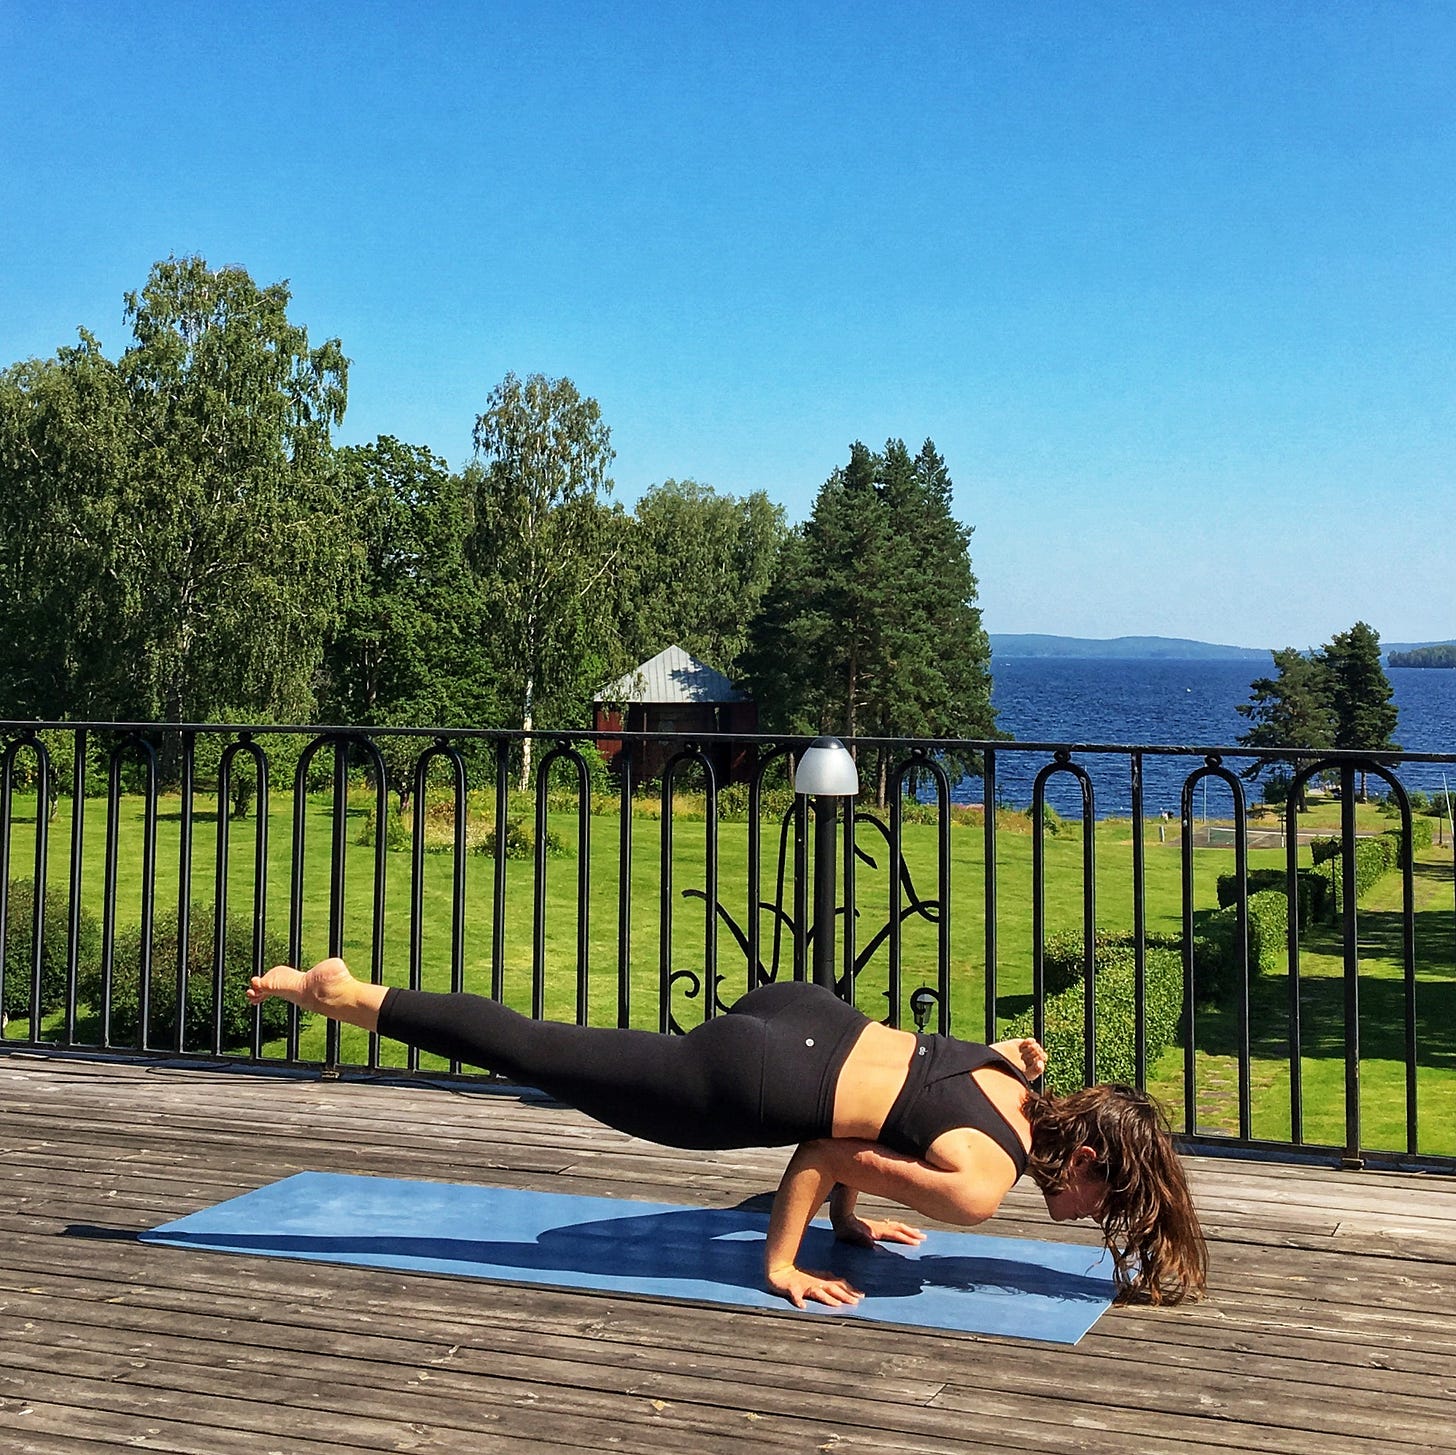
While you’re here, want to play with an arm balance? Come into the back toes, lifting the knee, and tuck the left shoulder underneath the left calf. Maybe you interlace the fingers behind the back.


Then you can bring the hands to the ground, bending the arms 45 degrees to make a little shelf. This is easier if you stack the right hip bone on the right elbow and harder of the right arm is free of bodyweight. Walk the front toes forward forward forward until the foot comes off the ground. Maybe stay here; maybe lift the back toes. Maybe you fly :)
(I have this same series posted from the other side below, where you might get a better visual of this particular pose).
If you’re flying, look toward the front of your mat, and try jump back and land in a chatturanga low pushup. If you’re not flying, step back into a plank and lower into chatturanga. Inhale into an upward facing dog, and push back to a downward facing dog. Stay here for five rounds of breath.


Inhale the right leg up into a three-legged dog; exhale and draw the knee into the nose. Inhale it back up; maybe get in some core work here by repeatedly drawing it in and extending it. When you’re ready, exhale and step forward.

Inhale look up and open the chest; exhale straighten the front leg and fold. Repeat three times.

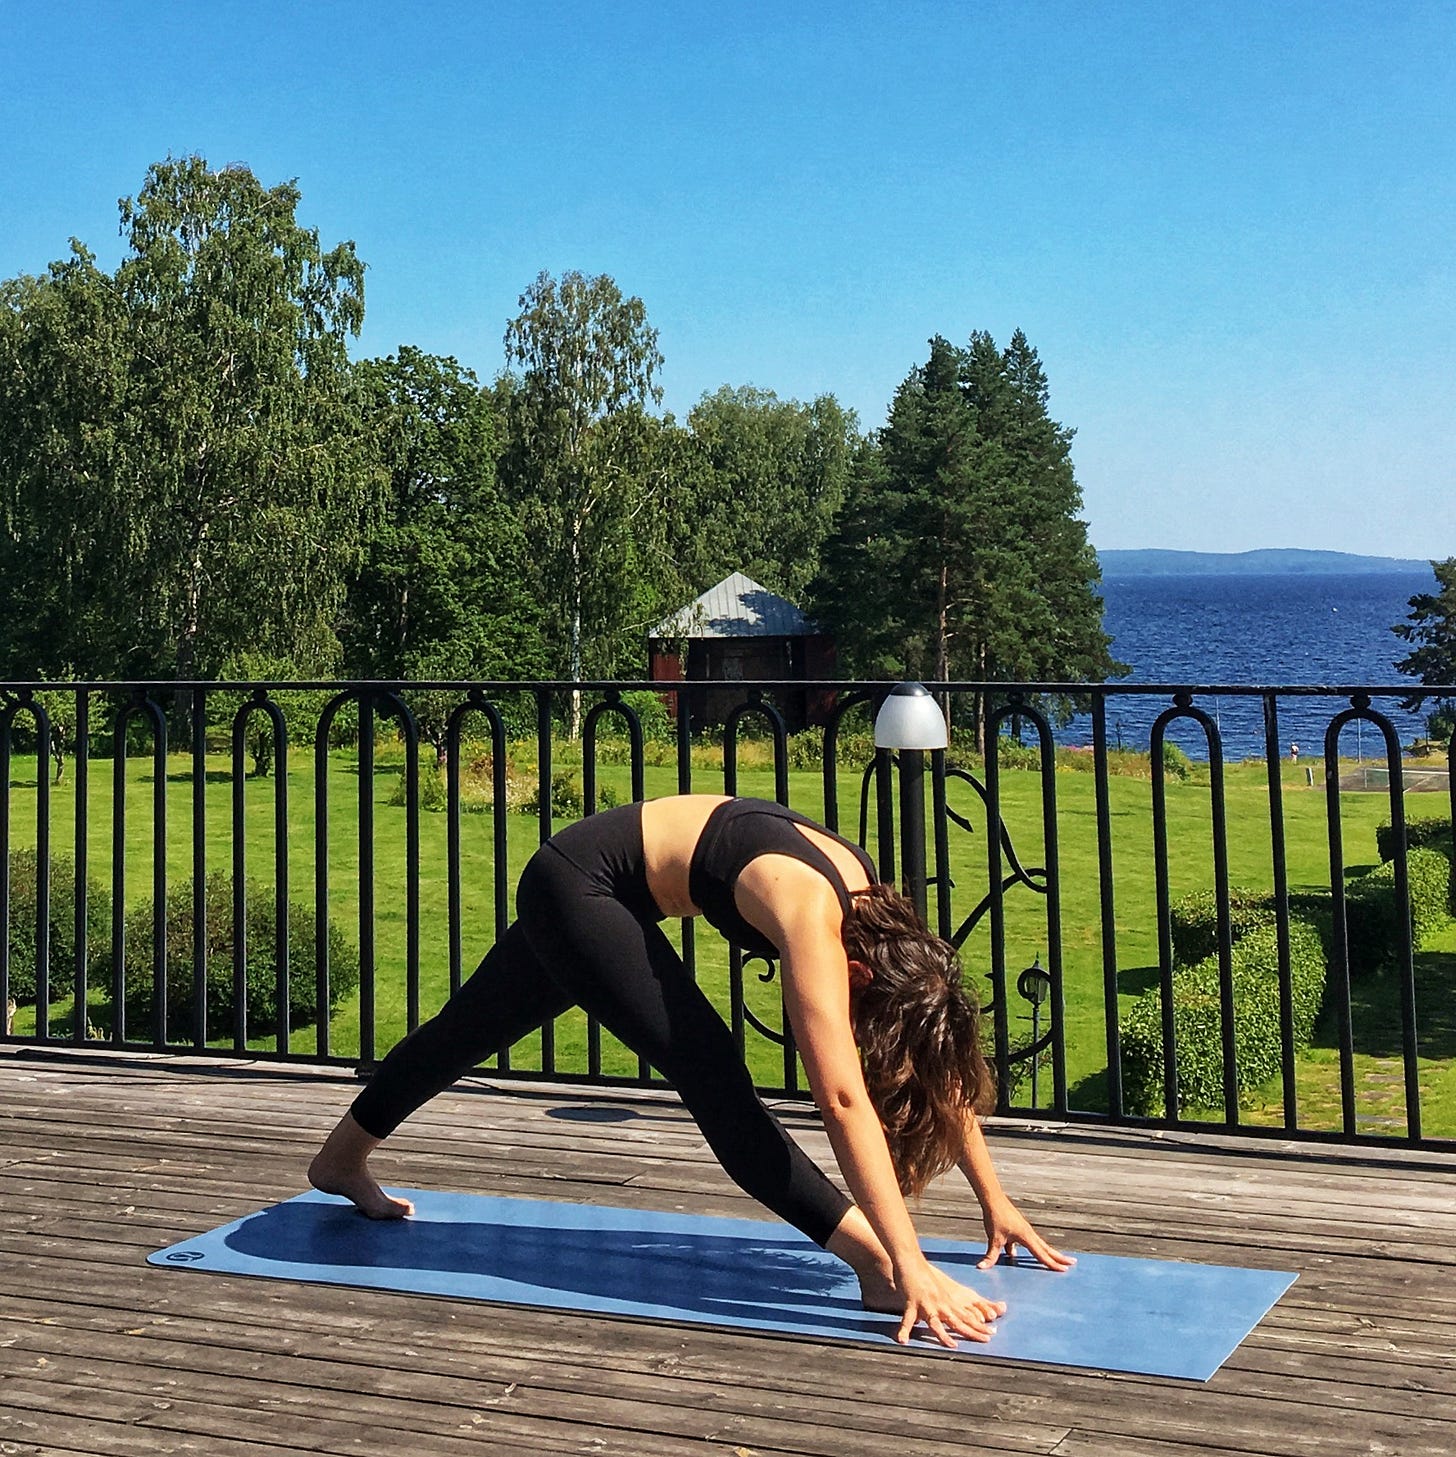
On your third exhale into this extended pyramid, hold the pose with a straight leg for three breaths. Continue to lengthen the spine rather than trying to round down. You can walk the hands far forward of the toes, or you can walk them back. This is a great place for blocks if your hands don’t reach the floor. You can also gently bend the front knee if this feels too intense.
Re-bend the front knee, and bring the back knee down to the ground. Inhale the arms up for anjaneyasana. Do what feels good and useful to open both the chest and the hip flexors here: You can stretch the arms back; you can bend at the elbows to support the head; you can open the elbows with the fingers interlaced behind the head or into a cactus shape; you can bring the finger tips to blocks or the ground. Stay for at least three rounds of breath.

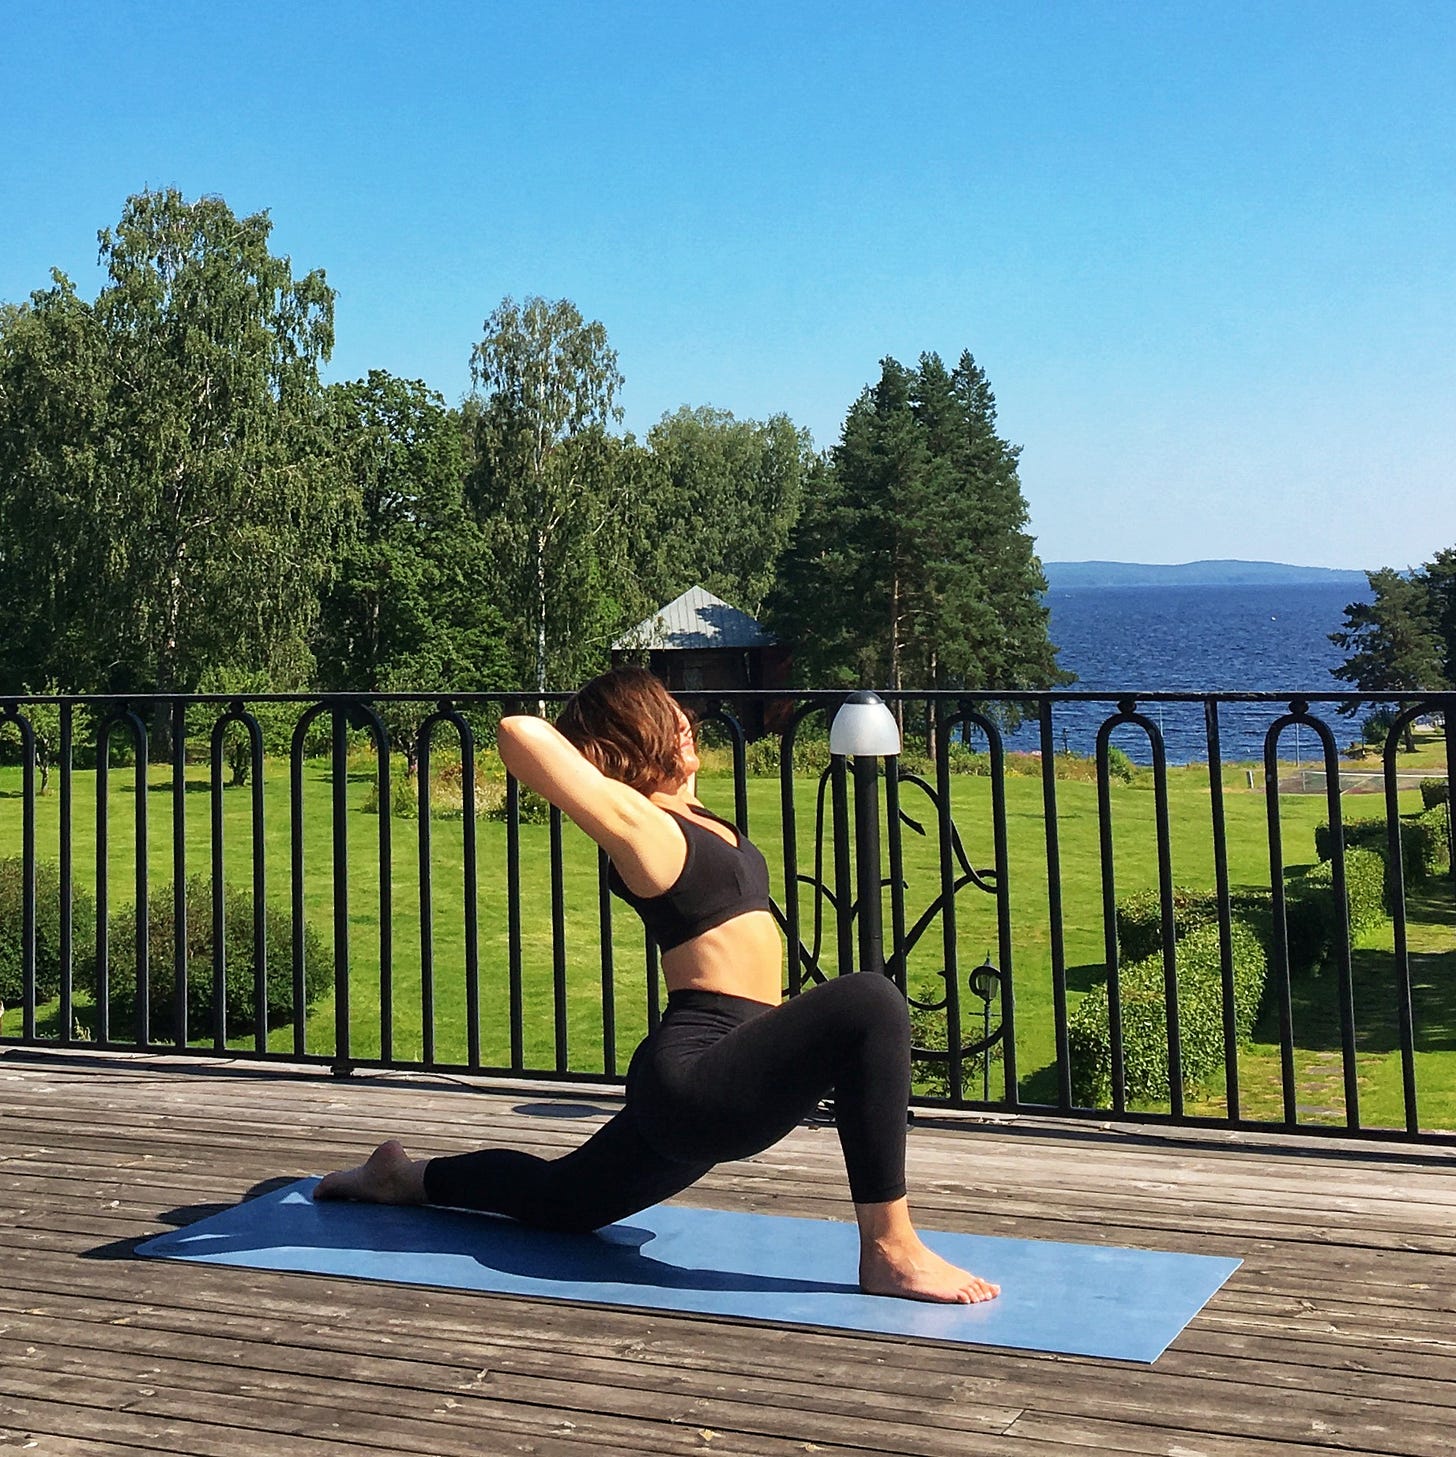

From here, you can straighten the front leg and come into a hamstring stretch, then repeat this sequence on the other side (that’s below). I usually do this whole thing two or three times on both sides before trying a full split.

***
If you’re ready to come into your split, tuck the back toes to start, and straighten the front leg (I typically keep a small bend in the front knee). Slide the front heel forward, then walk the back toes back; slide the front heel forward a little more, and walk the back toes back a little more. Keep the hips facing squarely forward, and the spine straight and upright — resist the temptation to fold forward. Shoulders should be over the hips.
You can use your hands on the mat to help hold you up, or stick a pillow or a block underneath the front hamstring for more support.
It really pays to use your front quad — engage it. When the quadricep muscle is engaged, it’ll signal to your hamstring that it’s safe to release a little more.

Here, I also like to do a little pulse: I’ll engage all of my leg muscles to lift my body up off the ground, then relax them to get lower. Repeat that four or five times, and you’ll find that your muscles give a lot more. You can keep your fingers on the mat or blocks; you can bring a prayer to the chest; you can raise the arms above your head. I eventually like to untuck the back toes and really press my big toenail into the mat, but keeping the toes tucked works too, and is a little easier on the balance.
Your hamstring may not be flat on the floor (I have a minor right hamstring injury and as you can see here, mine didn’t quite get to the ground when I was taking these photos). Maybe you’re miles away from the mat. That’s ok! It’s a process. And it’s just yoga — doing the splits will not actually make you a better person. Enjoy where you’re at.
Wherever you are, try to hold it for ten breaths, being mindful that it should feel challenging but not painful or straining. If you can’t breathe easily, you’re in it too deep.

Come out of it slowly. If you want an extra challenge, try to keep the hips low, and rotate into a wide-legged seat. This is tough, but great for hip rotation. Bring the left hand in front of the groin and the right hand near the right thigh to help rotate your body to the left, facing the long edge of the mat.

Sit, and use your hands to move your feet as wide as they’ll go. Then put both hands on the mat behind the bum, and scoot yourself another inch forward.

Stay if this feels like enough. If you want a little more, you can gently fold forward. If you want a lot more, you can hold onto the feet and guide your chest toward the mat (mine doesn’t quite get there).
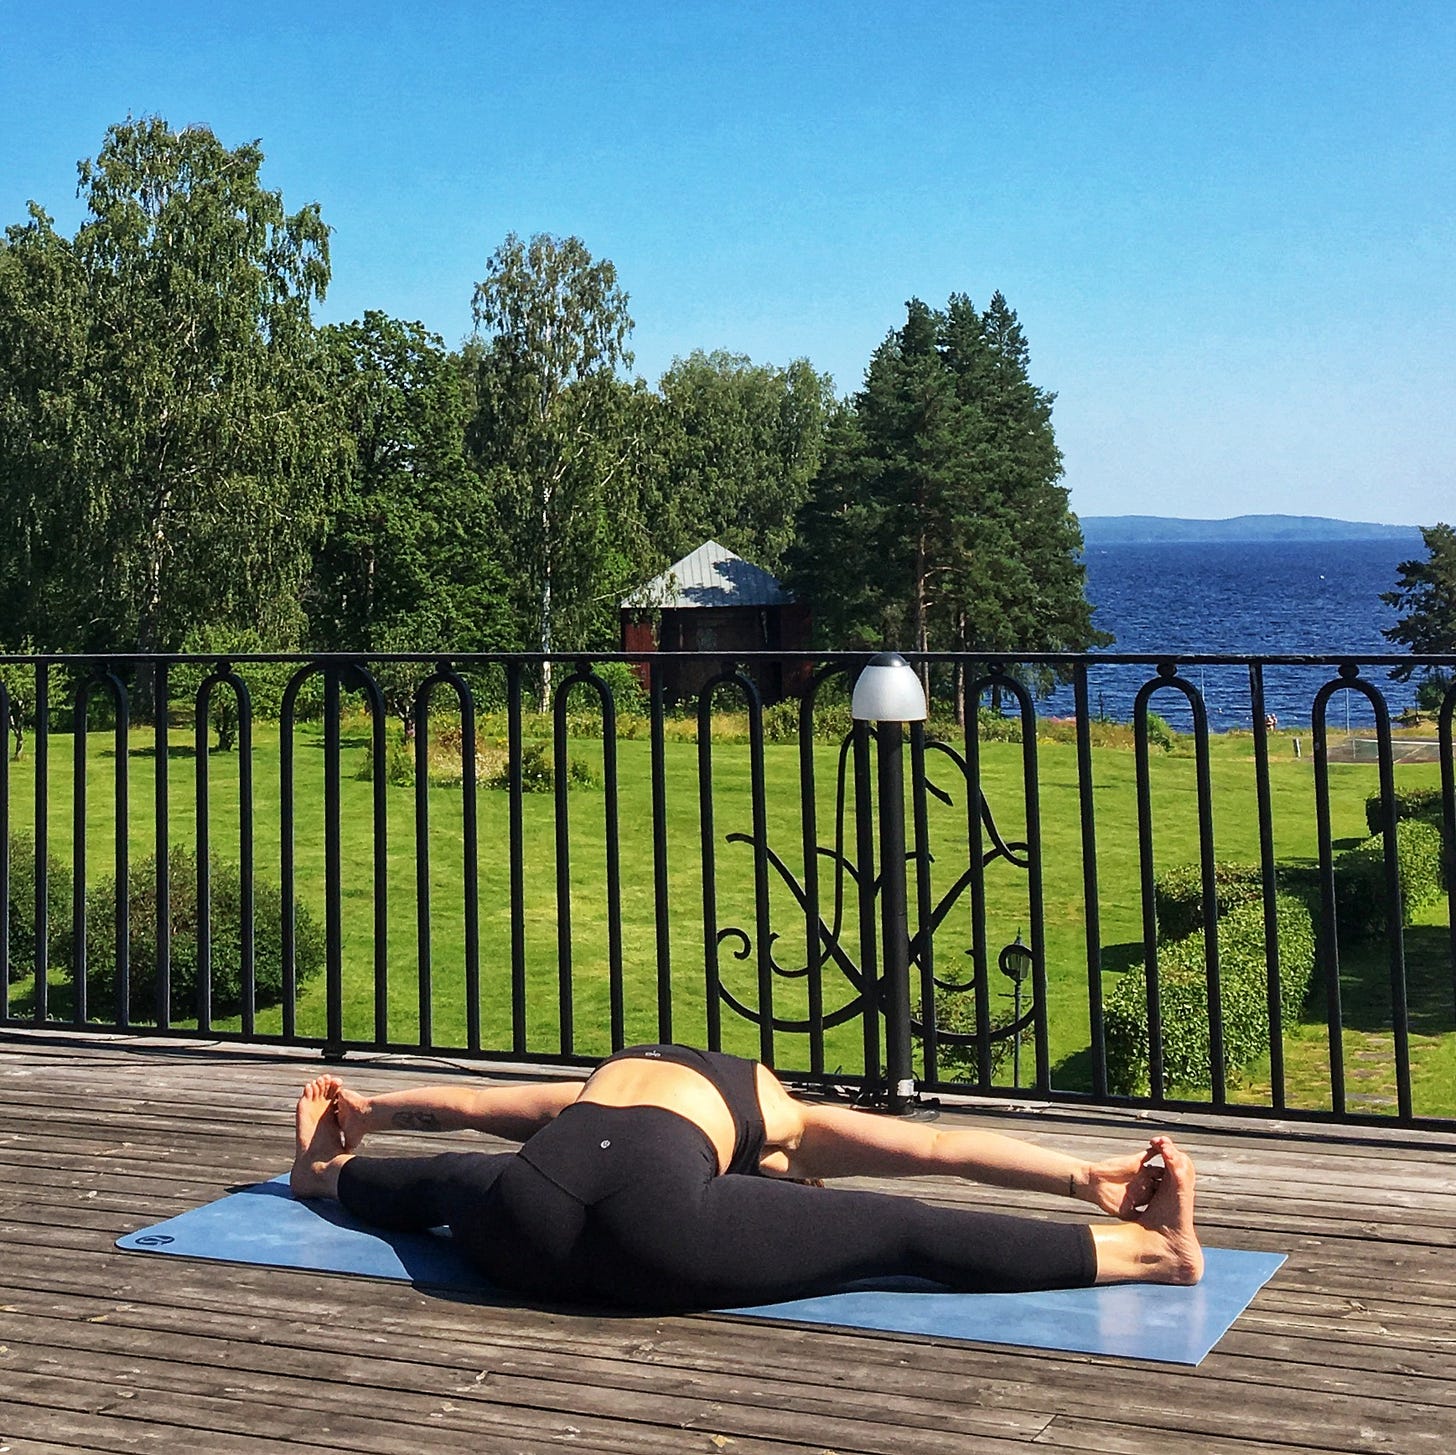
And that’s it! GOOD JOB!
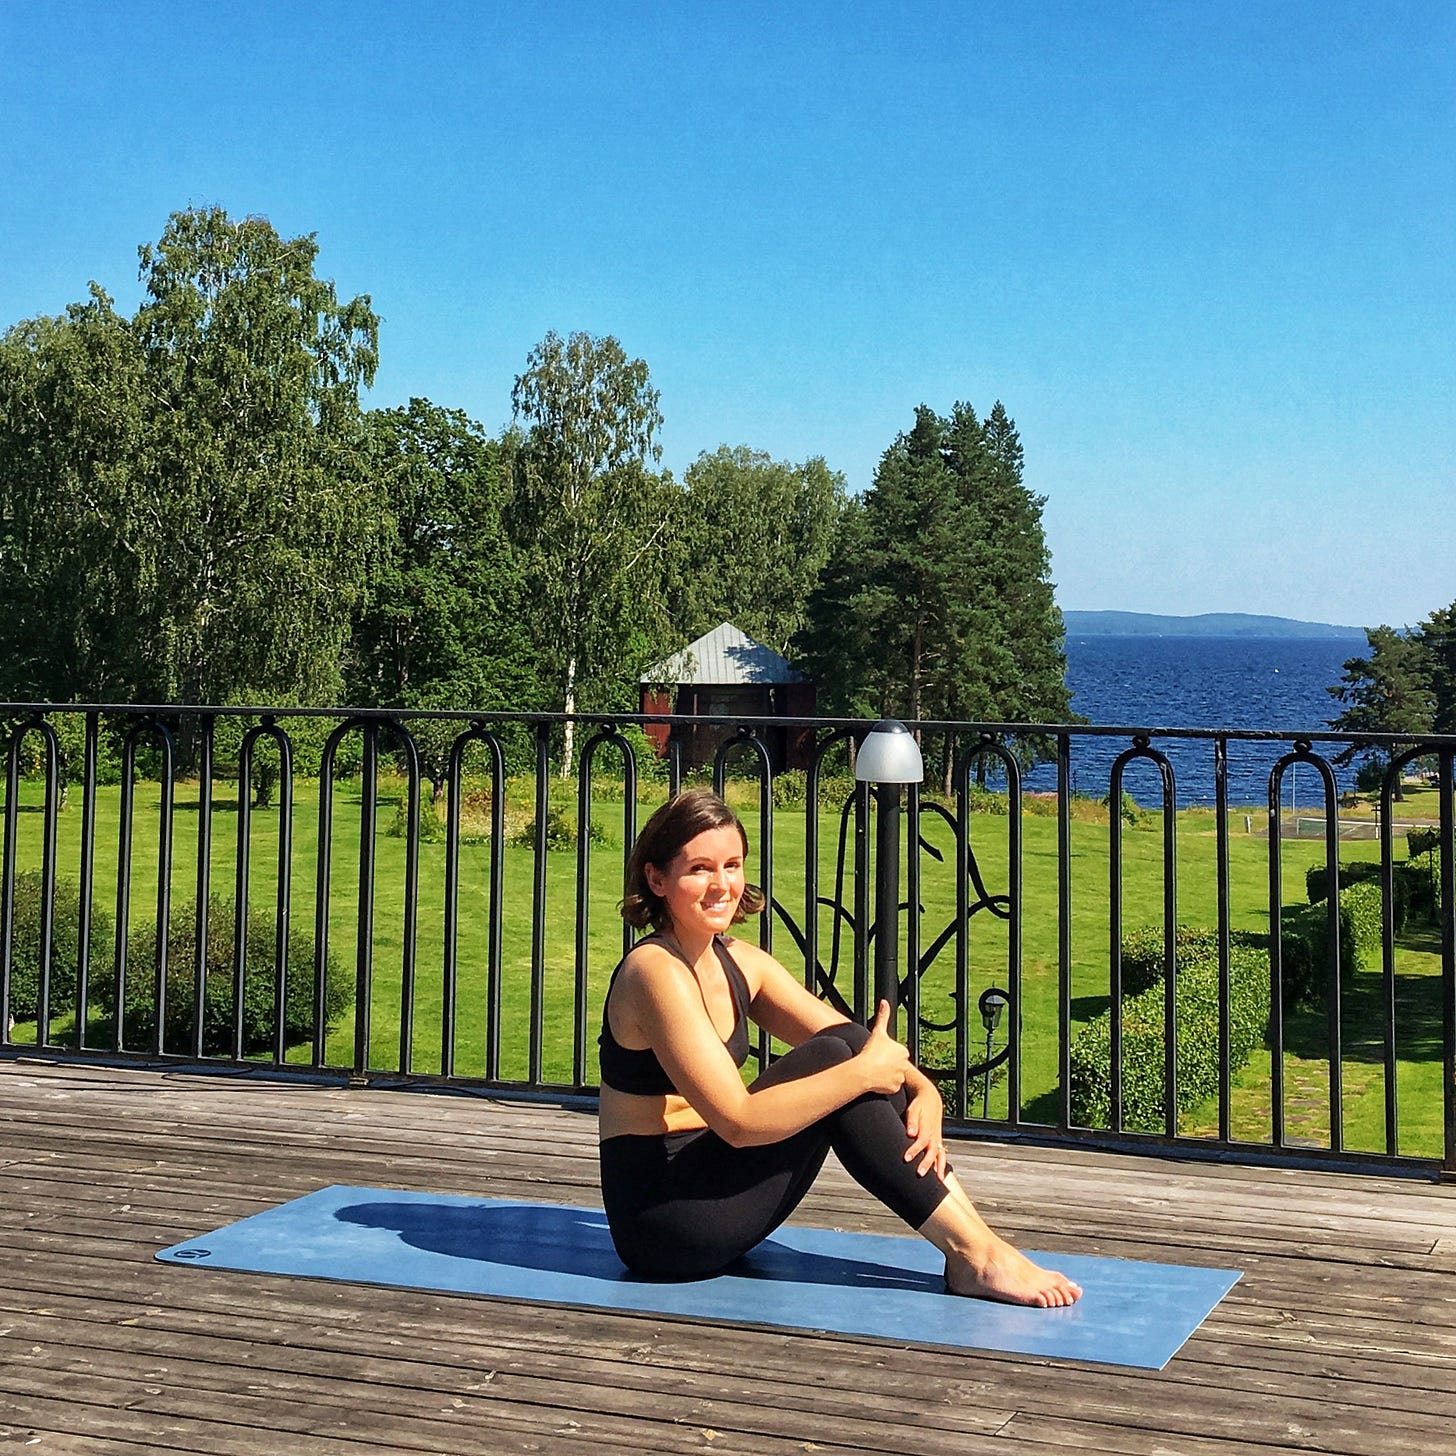
…now you just have to do the other side.
Bring yourself up to stand. Breathe.

Inhale the arms up above the head and see your thumbs. Forward fold with hands in prayer, the spine long and collarbones wide.


Step the left leg back into anjaneyasana.

And do what feels good with the arms here: Bend the elbows, open the heart, cactus them, bring them wide and to the ground, just keep the chest open.

Maybe you hang out here. Maybe you bend the back knee and hold the left foot with the left hand. Maybe you hold the foot so the fingers and toes face the same direction, and your elbow points up (preparing, eventually, to flip your grip). Maybe you put the left foot in the crook of the left arm. Maybe your right arm comes over your head and you interlace the fingers, coming into a mermaid lunge.

Release the left foot and square the hips forward, bringing the left hip directly over the left knee. Straighten the front leg, lengthen the spine, and walk the hands forward for a hamstring stretch.

Maybe you walk the hands very far forward of the toes (my personal favorite). Or maybe you walk them back. Either way, try to keep the spine long — think forehead to big toe rather than thinking about getting your nose to your knee or shin.

Raise the chest, bend the front knee, and come into your lizard pose with both hands inside the front foot. Stay on the hands, or come to the forearms.
If you want even more, you can wrap the right armpit around the right ankle and begin to lower the chest to the ground with the arms wide.


Stay here, or play with a variation. You can walk the right foot out a little farther to the right, and take the left foot in the right hand, kicking the foot to open the chest.
Then you can square the shoulders forward and use your arm strength to draw the heal toward the bum, stretching the quad. Hands or forearms can be on the mat.


Want to play a little bit? You can tuck the right shoulder under the right thigh, wearing your leg like a backpack, and bind the hands.

Or you can plant the hands, make a shelf with your arms, walk the front foot way way way forward until it lifts off and play with taking flight.
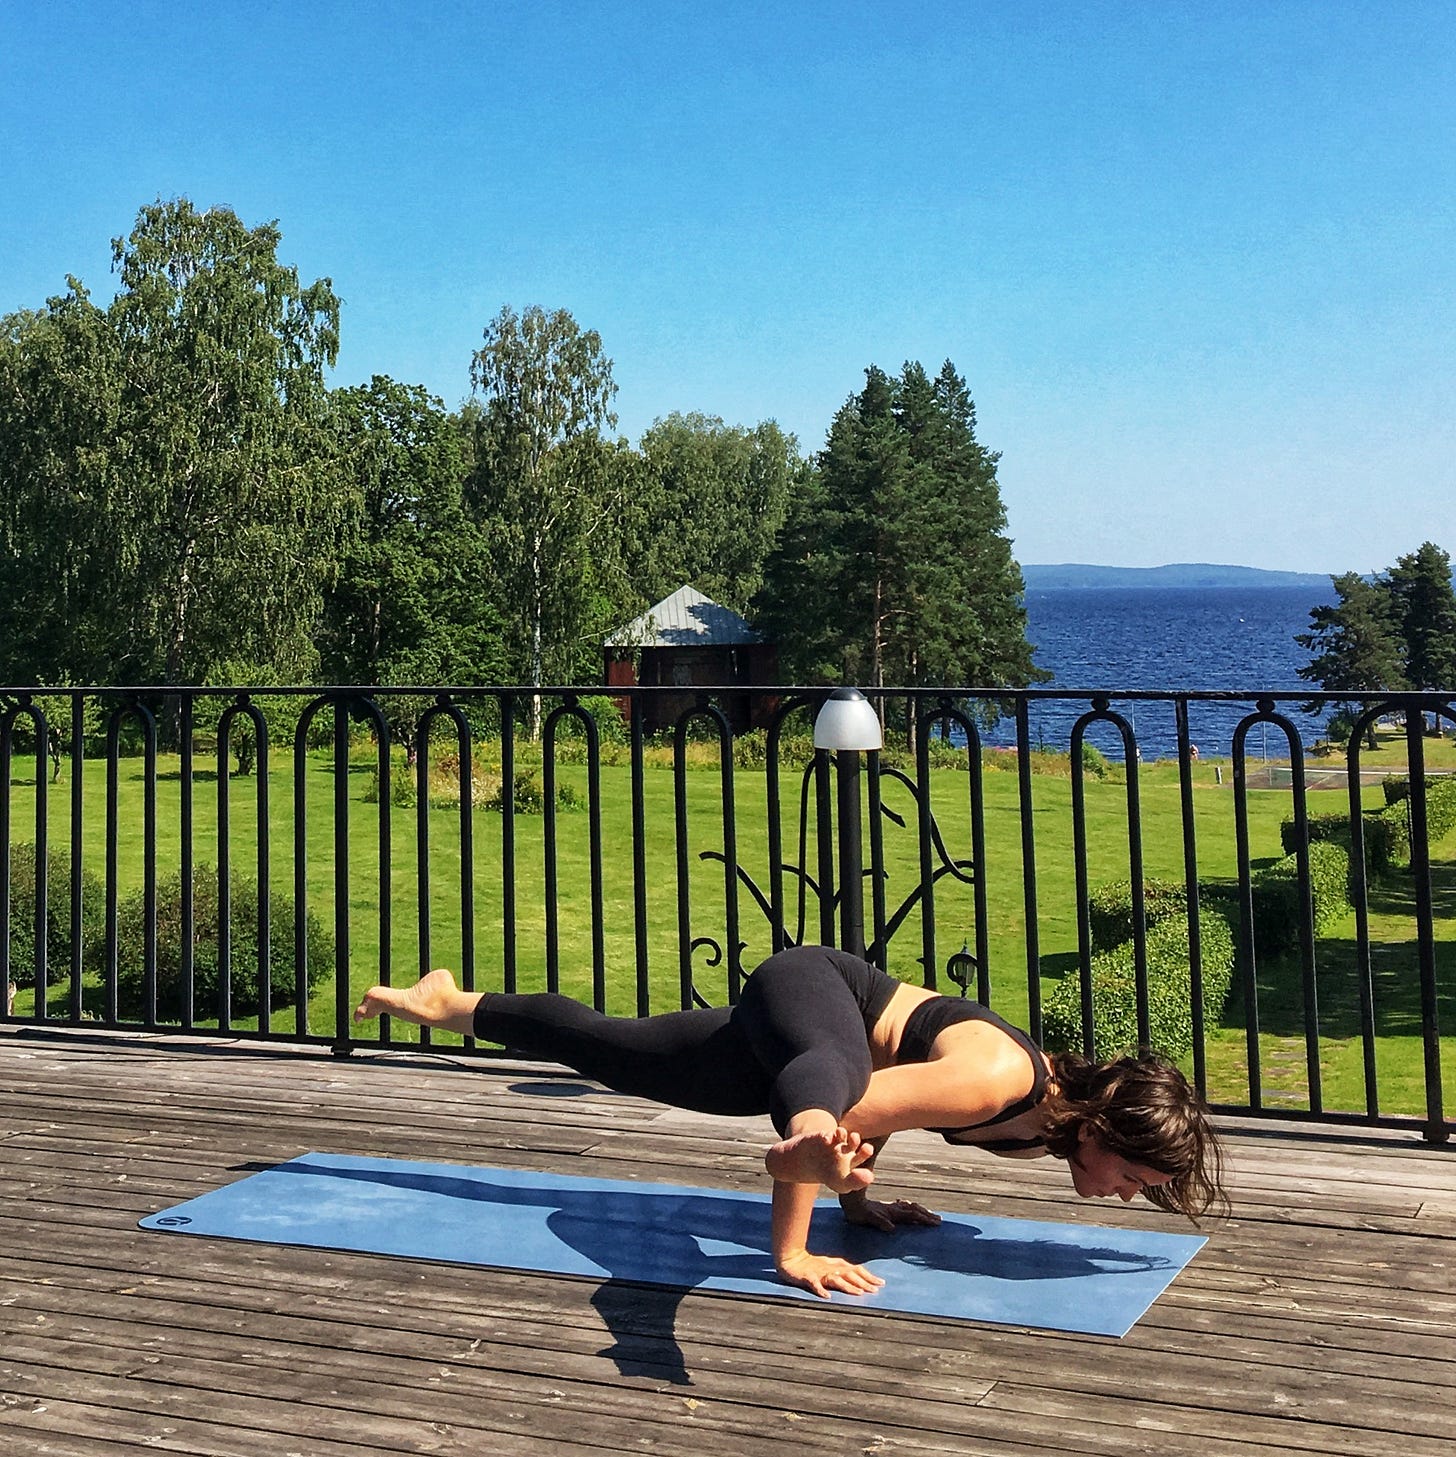
Jump back to a chatturanga low pushup, or step back into plank and lower halfway down. Inhale into an upward facing dog, and exhale into a downward facing dog. Stay for three breaths.
Inhale the left leg high for three-legged dog; exhale draw the knee into your nose. Inhale extend it long and exhale it to the nose — do this as many times feels useful to get a little more work in, doming the back every time you draw the knee in.

When you’re ready, step the left foot forward between the hands, expand the chest and look up.

Exhale straighten the leg and fold. Inhale the re-bend, and repeat this bending / straitening sequence three times.

The third time, stay in this forward fold with the front leg straight (or straight-ish). Hands can stay forward, or you can walk them back. Keep the spine long rather than rounded. You won’t get as low, but it’ll be a deeper stretch.


Bring the right knee to the ground and come back to an anjaneyasana, which should feel pretty familiar by now. Do your thing with the arms, just make sure you’re engaging the low belly to protect the lower back.
It’s also nice here to untuck the back toes and really press your big toenail into the mat. Feel how it changes the pose to press both feet hard into the earth — you’ll get a lot more lift in the chest.

Bring the hands back to the mat and straighten the front leg. Stay in a hamstring stretch with the right hip directly over the right knee (tucking the back toes for additional balance) or begin to come into a spit by edging your front heel forward and your back toes back, alternating between them, until you’re as low as you’re gonna get.

Maybe your hands help to hold you up. Maybe you engage your muscles and pulse a bit here. Maybe your hands come to your heart or above your head. Do what feels good, and try to stay for ten long breaths.
Ease out of it, and work on the hip rotation by keeping the hips low to the floor as you move toward a wide-legged seat facing the long edge of the mat.
Use your hands to move your feet wider, and then scoot your bum forward. Stay here, or fold. Or, hold the feet for a little more leverage.

Come out gently, maybe using the hands to help re-bend the knees.
Ok now that’s really it. GOOD JOB!! Also here’s a video of a (slightly modified) version of the above if that’s easier to follow.
Like the yoga? Want tutorials on specific poses or parts of the body? Lemme know!
Politics will be back next week. In the meantime, enjoy all of the best things about late summer.
xx Jill


